
A home assistant z-wave setup has four parts, and Home Assistant’s own documentation takes you through them in order: plug in an adapter, let a Z-Wave server start, finish the integration, then pair devices. We read two Home Assistant pages on 22 November 2026. We tested nothing and set up no network, and we give no prices and no product picks.

Each point is attributed to the page that states it, and menu paths are copied from the pages and may change. Where we add reasoning, we mark it with the words in our view.
Table of Contents
Home assistant z-wave setup: the four parts of the network
The Z-Wave integration page says a Z-Wave network in Home Assistant includes four elements.
- A Z-Wave adapter. The page’s example is the Home Assistant Connect ZWA-2.
- A Z-Wave server. The page’s example is the Z-Wave JS app, formerly called an add-on.
- The Z-Wave integration itself.
- Z-Wave end devices, meaning the things you pair.
In our view, this four-layer picture is the most useful idea in a home assistant z-wave setup for a newcomer, because when something fails you can ask which layer is missing. If you are still choosing a radio, our Zigbee, Z-Wave, Thread and Wi-Fi comparison puts them side by side, and our ZHA setup guide covers the Zigbee route.
Home assistant z-wave setup with the Z-Wave JS app
The page’s sequence for a server using the Z-Wave JS app needs one thing first: a supported adapter. Then:
- Open the Home Assistant interface.
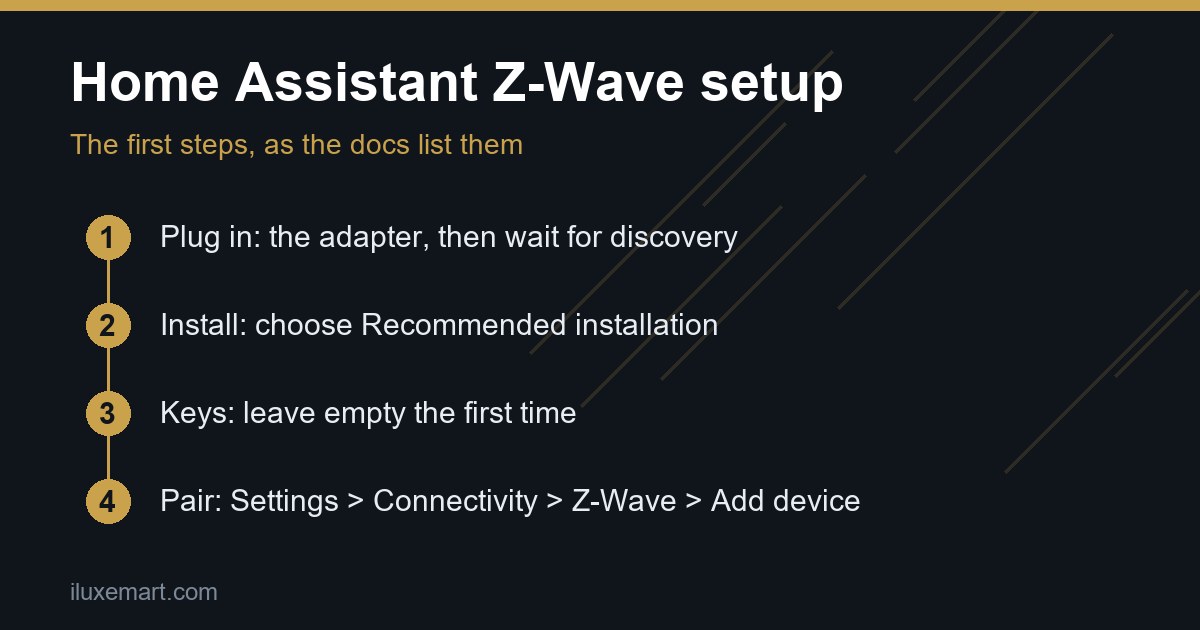
- Plug the adapter into the device running Home Assistant. The page says it will most likely be recognised automatically.
- In the dialog, choose Recommended installation. This installs the Z-Wave JS app on the Home Assistant server.
- Add the adapter to an area and select Finish.
If the adapter is not recognised, the page’s FAQ suggests checking that it is powered and that the cable carries data, not power only. It also says you can add the Z-Wave integration by hand from Settings > Devices & services.
Home assistant z-wave setup: network security keys
On some Home Assistant versions the install is followed by a request for network security keys. The page gives two cases.
- Using Z-Wave for the first time: leave every field empty and select Submit. The system generates the keys.
- Re-using an adapter that has already paired with secure devices: enter the previously used network key as the S0 network key. The page says the S2 keys are generated automatically.
The page asks you to keep a copy of the keys somewhere safe, in case you move the adapter to another device. Afterwards, the FAQ says you can view them under Settings > Apps > Z-Wave JS, on the Configuration tab. A backup of Home Assistant itself is a different job, and our USB backup guide covers one route.
The first start: the interview and waking battery devices
A note on the page explains what happens on first start. The pairing record lives on the adapter, but extra metadata does not, so the integration interviews the whole network when it starts, and the page says that can take a while with many devices.
You can speed it up by manually waking battery-powered devices, which the page says is usually a button press, so check each manual. It adds that you do not need to exclude and re-include devices. This matters in any home assistant z-wave setup that reuses a network: the page says the first start can take a while.
Adding a device in a home assistant z-wave setup
The page’s path is Settings > Connectivity > Z-Wave, then Add device. The adapter is now in inclusion mode. Check whether the device supports SmartStart: look for the label on the packaging, and find the QR code on the packaging or the device.
Option 1, SmartStart. Make sure the device is off, select Scan QR code and scan it. If scanning fails, the page says you can paste the QR content as text from another reader. After the scan, if the device supports Z-Wave Long Range, you are asked to choose a network type.
- Long Range: for a device far from others, or in a spot with past connection problems. The page adds that it might help preserve battery life.
- Mesh: if you already have a mesh. The page says adding it can improve that network’s coverage and reliability.
Then turn the device on and set it into inclusion mode. If it was already on, the page says you might need to power-cycle it.
Option 2, no SmartStart. Use the device’s manual to set it into inclusion mode.
If it uses S2 security, you may be asked for a PIN, which the page says is often in the documentation and printed on the device. The interface should confirm the device was added, and entities appear after seconds to minutes.
When a pairing will not start
If the adapter fails to find the device, the page says to cancel the inclusion. The page says that in some cases it might help to remove the device (exclusion) first, even if it was never in this network. Another approach is a factory reset of the device, following its manual.
The page carries two Important warnings. It warns against carrying the adapter to a device to pair it, saying that is now unnecessary and damages routing. It also warns against starting inclusion on the adapter itself, which it says is no longer supported. In our view, these are the two to remember if older advice tells you to carry the stick across the room.
Home assistant z-wave setup: removing a device
The page says to remove a device before using it with another adapter, or when you no longer use it. This removes it from the network stored on the adapter and from Home Assistant, along with its entities. A device still paired with an adapter cannot join a new network, the page says.
- Go to Settings > Devices & services and select the Z-Wave integration.
- Select the device, open the three-dot menu under Device info and choose Delete.
- Select Remove a working device. The adapter enters exclusion mode.
- Put the device into exclusion mode, using its manual.
Radio region in a home assistant z-wave setup
The page says the frequency Z-Wave uses depends on your region. For 700 and 800 series adapters the page says the frequency is adjustable. End devices are fixed to their region, so check the region before you order them. That is the easy mistake when ordering from abroad (our reading).
With the Z-Wave JS app, Home Assistant sets the region automatically. To override it, go to Settings > Apps > Z-Wave JS, open the Configuration tab and pick the Radio Frequency Region under Options. Automatic uses the location under Settings > System > General, and uses Long Range where available and supported.
If you set it by hand, there are Long Range options for Europe and USA, and you can still add devices without Long Range. Select Save to apply. The prerequisites are administrator rights and devices that are all rated for that region.
Home assistant z-wave setup: backup, restore and firmware
The page recommends a backup before major changes, such as a new adapter or a reset. It holds the adapter’s non-volatile memory (NVM), including paired devices, as a binary file.
- Back up: Settings > Connectivity > Z-Wave, then Download under Download backup.
- Restore: Settings > Connectivity > Z-Wave, then Restore under Restore from backup, and choose the file.
The page also has a firmware warning. Devices that support the Firmware Update Metadata Command Class can take an uploaded file, but an update can damage a device. Confirm one is necessary, use the right file and do not interrupt it. The page says the Home Assistant and Z-Wave JS teams accept no responsibility for damage. We did not try this.
Resetting an adapter
In a home assistant z-wave setup, the page recommends a backup before a reset. It makes the adapter forget every paired device, and the network’s devices vanish from Home Assistant. The page says any device still paired at reset time must be excluded before it can be paired again.
Before the reset, the page lists removing all paired devices from the network as a prerequisite. It says removal can be done by any adapter, not just the one that originally managed the network, and that in theory it could also be done later. The path is Settings > Devices & services, the Z-Wave integration, the controller, then the three-dot menu and Factory reset. When the status entity becomes unavailable, the reset is finished.
What the adapter page says about choosing an adapter
The adapter page names the Home Assistant Connect ZWA-2 as the recommended adapter, describing it as an 800 series adapter built by Home Assistant for use with Home Assistant.
For newcomers, the page recommends an 800 series adapter with firmware updated to 7.23.2 or later, and USB over a module, because passing a module through Docker is more complicated.
It says some 800 series adapters have bugs affecting mesh stability, and no known firmware is completely fixed. Its SDK guidance reads as follows.
- Prefer 7.23.x and newer.
- 7.22.x is okay.
- 7.17.2 to 7.19.x is okay.
- Avoid versions before 7.17.2.
- Avoid 7.20 to 7.21.3.
The page says the SDK version and the firmware version need not be the same, and that you should ask the manufacturer if you are unsure. The newcomer line gives a firmware version (7.23.2 or later) and the list gives SDK versions (7.23.x and newer). The page does not spell out how the two relate. For a Zigbee dongle instead, see our buying guide.
A short home assistant z-wave setup checklist
This ordering is ours, from the two pages.
- Read the adapter page’s firmware guidance before you plug in.
- Check that your devices are specified for your region.
- Plug in, then choose Recommended installation.
- Leave the key fields empty the first time, and copy the keys somewhere safe.
- Let the first interview finish, waking battery devices if needed.
- Add one device at a time, noting whether it offers SmartStart.
- Download a backup of the adapter memory.
What we could not confirm
- We tested nothing, so we cannot say how any adapter or device behaves, or that a home assistant z-wave setup will go smoothly.
- We make no claim that any adapter or device is better than another.
- Device-specific inclusion steps are in each manual, which we did not read.
- The page also covers an adapter connected through an ESPHome device, migrating to a new adapter and moving from Z-Wave JS UI. We did not cover those routes.
- The pages carry no dates, so menu paths and firmware advice may change. Statements marked in our view are ours, not the Home Assistant project’s.
Your next step
Open the adapter page and read the firmware section against the series you have in mind, then read the integration page’s Getting started section once, start to finish. When you are ready for a first home assistant z-wave setup, work through the checklist one step at a time.
How we checked
We read two Home Assistant pages on 22 November 2026. This is a documentation read, not a test. We ran no home assistant z-wave setup of our own and paired no devices.
Sources read 22 November 2026: Home Assistant, Z-Wave integration, Home Assistant, Z-Wave adapters.
More in this series: No-subscription and private smart home guides.