Home Assistant security comes down to a short list in the project’s own documentation: strong unique passwords with multi-factor authentication (MFA, often called 2FA), care with secrets and tokens, a safe way to reach the system from outside, and regular updates. We read five Home Assistant documentation pages on 20 November 2026. We tested nothing and changed no setting, and we give no prices and no product picks.
This post is a read of the home assistant security docs, not an audit, and it promises no outcome. Each point is attributed to the page that states it, and where we add reasoning we say so. Menu names are the ones the pages use, and they may change with later releases.
Table of Contents
Home Assistant security starts with a three-item checklist
Home Assistant’s securing page opens by saying the system runs on your own hardware and does not depend on a cloud service, which it says already removes a large category of risk. It still lists steps to take, especially if you plan to reach the system from outside your home network.
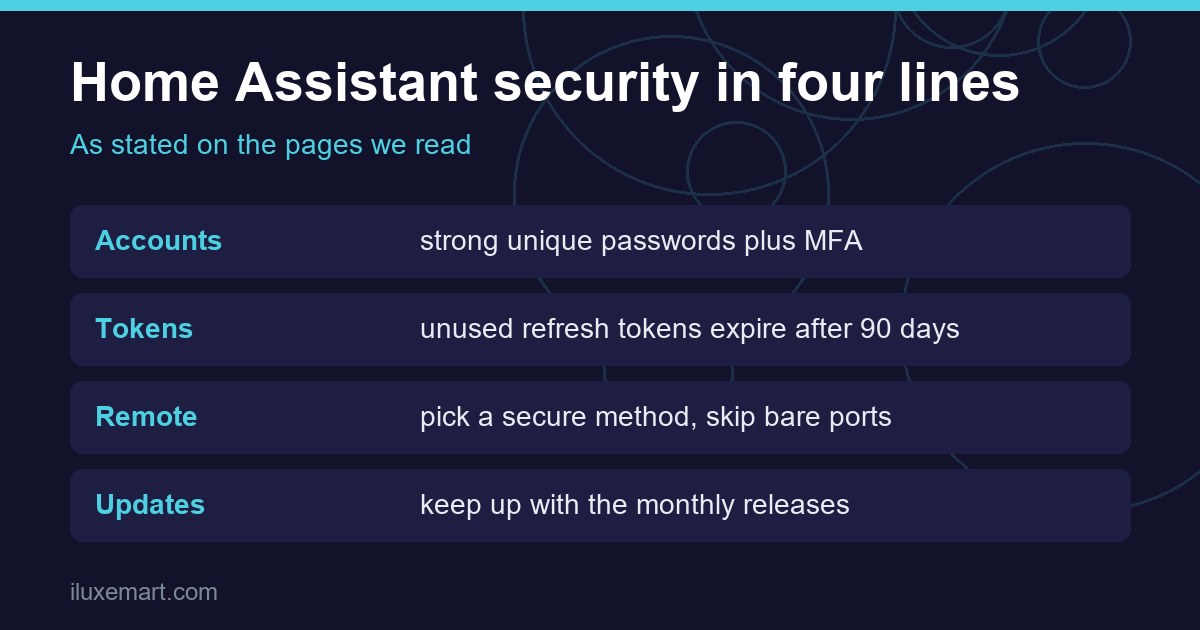
The page’s checklist has three items:
- Give every account its own strong password and enable MFA.
- Keep sensitive data in secrets, and back them up.
- Install each monthly release.
On the second item, the page adds a note that storing values in the secrets file does not encrypt them. In our view, the file is a tidy place for sensitive values, not a vault, so it and its backups deserve care. Our Home Assistant USB backup guide covers backups, and our look at the 2026.11 release covers what to check when a monthly update lands.
Home Assistant security for accounts: passwords and admin rights
The securing page calls accounts the first line of defense, especially when you sign in from outside your home network. It repeats the advice for a strong, unique password per account, mentions a password manager as an aid, and says to give administrator access only to accounts that need it. The Authentication page puts it plainly: your password is the key to your home.
In our view, home assistant security in a busy household starts with who really needs admin. A wall tablet or a guest is a plausible candidate for a non-admin account, though the pages name no specific cases.
Home Assistant security tokens and sessions under User profile > Security
The Authentication page sends you to User profile > Security to manage how you sign in, and says these settings affect only your own account. There you can change your password, turn MFA on or off, manage refresh tokens and create long-lived access tokens.
Each sign-in from a device creates a refresh token, and removing it signs that device out. Unused refresh tokens are removed automatically, and the page counts one as unused if it has not been used to sign in within 90 days. For a permanent token, it recommends a long-lived access token instead.
Long-lived tokens exist so scripts and apps can interact with Home Assistant, and the HTTP integration page shows one in use for sending device data in. In our view, a long-lived token held by a script is a credential like a password. The pages do not say so directly.
Changing your password. The page’s steps are: open User profile > Security, find the Change password card, enter the current password, enter the new one twice and select Submit. Home Assistant then asks whether to sign out of all other sessions. Choosing Yes makes other devices log in again with the new password; No leaves them signed in. If you change a password because you suspect a leak, in our view, Yes fits that aim, though the page does not say so. We changed no password.
Home Assistant security and 2FA: how MFA works
The Multi-factor authentication page says a password can be compromised, for example guessed if it is simple, so MFA adds a second challenge. It frames the two parts as something you know, such as your username and password, and something you have, such as a one-time password sent to your phone. You can switch MFA on and off for your account under User profile > Security.
The authenticator app route. The page describes Time-based One-Time Password (TOTP) as widely adopted. Home Assistant generates a secret key that is synchronized with an app on your phone, the app shows a six-digit number about every thirty seconds, and Home Assistant, which knows the key, knows which number to expect.
The setup the page describes is:
- If no auth_mfa_modules section is defined in configuration.yaml, the page says a TOTP module named Authenticator app is loaded automatically.
- Install an authenticator app on your phone.
- Restart Home Assistant, then go to User profile > Security.
- Under Multi-factor authentication modules, choose Enable to get a new secret key.
- Add the key to the phone app by scanning the QR code or typing it in, then enter one of the app’s codes to confirm.
Two cautions matter most. The page tells you to treat the secret key like a password and never expose it to others. And TOTP relies on an accurate Home Assistant clock, so if verification keeps failing, check the clock.
The Notify module. The page also describes a Notify module that sends a one-time password through the notify integration. It warns that the module cannot tell whether the message arrived, so a lost notification means no login.
Home Assistant security for remote access: Cloud, VPN and ports
The Remote access page says that by default you can reach Home Assistant only from your local network, which it says keeps things private and secure. The securing page says that to reach it from outside you should set up a secure method rather than expose it directly to the internet. The remote page adds a tip to follow the securing checklist first.
Home Assistant Cloud. Both pages call Home Assistant Cloud the easiest and safest option, which is the documentation’s own view, and the remote page adds “for most people”. The pages say it needs no open router ports and that setup is a single toggle after you sign in. The securing page says your subscription supports the Open Home Foundation, and the remote page says it helps fund Home Assistant’s development. We give no price, since the pages state none.
This site is about subscription-free setups, so the options below matter, and our guide to Home Assistant remote access without Nabu Casa goes deeper on that route.
VPN. The remote page calls a Virtual Private Network a secure way in and names Tailscale and ZeroTier One as examples. The VPN connection has to be established before you can connect from outside your local network. The page also says that without it, the Companion app on a mobile device will not update your sensors.
Reverse proxy. A reverse proxy is a server that passes outside requests on to Home Assistant. The page says you must configure Home Assistant to trust it, or requests are blocked by design. In the HTTP server section of Settings > System > Network, enable Trust X-Forwarded-For and list the proxy under Trusted proxies. The HTTP page says these settings have no effect if you use Home Assistant Cloud.
Port forwarding. The remote page describes forwarding a router port to the port Home Assistant listens on, which you find at Settings > System > Network under HTTP server, in the Server port field. It says new Home Assistant OS installs use port 80, OS installs set up before 2026.8 keep their old port, usually 8123, and other installation types use 8123. We cover no router steps.
Then comes the page’s Caution: “Just putting a port up is not secure.” It says to consider encrypting traffic when you connect remotely, and points to Let’s Encrypt guides. The securing page also lists TLS through the Duck DNS app with Let’s Encrypt. In our view, an open port alone is not a complete answer to home assistant security, which fits the page’s caution.
Home Assistant security and IP banning
The HTTP integration page describes a layer against repeated failed logins. Under Settings > System > Network, the HTTP server section has an Enable IP banning option. When it is on, you set Login attempts before ban, which the page says accepts 1 to 1000. A separate Unlimited login attempts option never bans an address.
After the first ban, the page says a file named ip_bans.yaml is created in the root configuration folder, listing the banned address and the UTC time. Bans do not expire by themselves. You clear one by removing its entry or deleting the file, then restarting Home Assistant. The same page also cautions that files served from the www folder are not protected by Home Assistant authentication. We tested none of this.
Home Assistant security extras for manual installs
For manual installations that use SSH, the securing page advises setting PermitRootLogin to no in the sshd configuration and using SSH keys instead of passwords, which it calls particularly important if you enable remote access to SSH. It also suggests hardening the host with good-practice guides. We read none of those guides.
A 6-step home assistant security checklist
This ordering is ours, built on the pages above. We tested none of it, and your install may differ.
- Review accounts. Give each person a strong, unique password and keep admin for accounts that need it.
- Turn on MFA. Use User profile > Security, and guard any TOTP secret key like a password.
- Tidy tokens. Delete refresh tokens for devices you no longer use, and track any long-lived access tokens.
- Choose a remote method on purpose. Compare Cloud, a VPN and a reverse proxy before a forwarded port, and encrypt if you forward one.
- Consider IP banning. If you open anything, look at Enable IP banning and Login attempts before ban.
- Update and back up. Keep up with monthly releases and back up your secrets.
What we could not confirm
- We tested nothing. We changed no setting and did not enable MFA, create a token, set up a VPN, forward a port or turn on IP banning.
- The pages show no publication dates, though each page header showed 2026.11.2, so menus and defaults may change.
- We cannot say any home assistant security setup following these pages is secure. No page promises an outcome, and we make none.
- We read nothing about specific vulnerabilities or incidents, and we cover no router steps.
- The securing page says to use a VPN or an SSH tunnel and to forward the required port on the router. The remote access page’s VPN section mentions neither an SSH tunnel nor port forwarding, and we did not reconcile the two.
- We did not read the Secrets, Cloud or authentication provider pages, or the Let’s Encrypt, Duck DNS and host hardening guides the docs link.
- Statements marked in our view are our reasoning, not the Home Assistant project’s.
Your next step
For a first home assistant security check, open User profile > Security on your own install and look at three things: whether MFA is on, which refresh tokens you still recognise, and whether you hold long-lived access tokens you no longer use. If you want remote access without a subscription, read our remote access guide next, and make a backup first with our USB backup guide.
How we checked
We read each page below on 20 November 2026. This is a documentation read, not a test. We did not set up, change or test any home assistant security setting.
Sources read 20 November 2026: Home Assistant, Securing your Home Assistant, Home Assistant, Authentication, Home Assistant, Multi-factor authentication, Home Assistant, Remote access to Home Assistant, Home Assistant, HTTP integration.
More in this series: No-subscription and private smart home guides.