Matter multi admin is the feature that lets one Matter device work with several apps at once, for example Apple Home, Google Home and Home Assistant. This guide covers five things to know before you share a device, based on the vendors’ and developers’ own pages. We tested nothing. Where the pages are silent, we say “we could not confirm.”
What Matter multi admin means
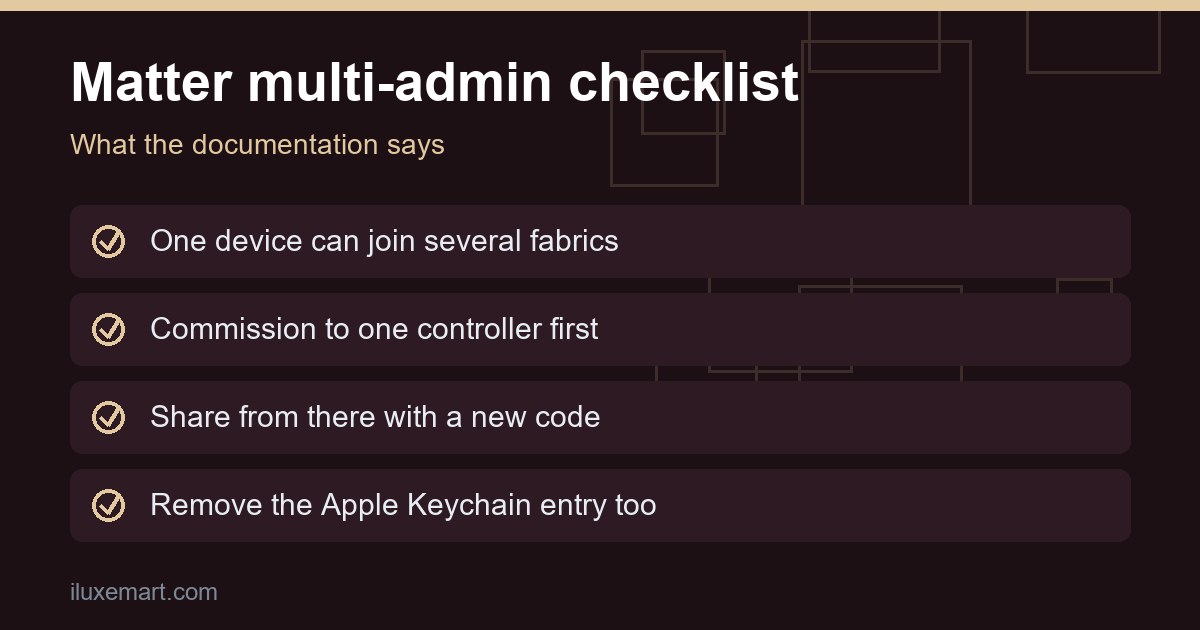
The Matter Handbook says a set of devices that share the same security domain is called a fabric, and that a node can be commissioned on more than one fabric. It calls this property multi-admin, so a Matter multi admin setup means one device holding several fabrics. Its example is a device commissioned to both the manufacturer’s fabric and a cloud ecosystem’s fabric, each “operating independently.”
Home Assistant’s Matter page puts it in everyday terms: each controller that controls Matter devices has its own fabric, and you can add a device directly to Home Assistant’s fabric or share it from another one, such as Google or Apple.
Two details from the developer pages are worth knowing. First, the Handbook says that with several fabrics the node’s data model is shared, so attributes, events and actions are common between them. Second, Espressif’s article explains that every node keeps an access control list saying which controller may do what. It also says a node’s resources (CPU and RAM) may decide how many fabrics it can support. We could not confirm a specific limit from the pages we read, and we did not read the Matter specification versions themselves.
5 essential things to know about Matter multi admin before you share a device
Here are five points to check before you share.
1. Commission to one controller first, then open a window
Silicon Labs describes the order. You commission the device to one fabric, then use that fabric’s controller to open a commissioning window. Another controller can then commission the same device into its own fabric, using the special pairing code generated when the window opens. The Espressif article describes the same idea: the admin asks the device to open its commissioning window again.
Each app wraps this in its own menu. Silicon Labs and TP-Link’s FAQ list these (the Google Home steps come only from those two pages; we could not open Google’s own help page):
- Google Home: open the device, tap the gear icon, then Linked Matter apps & services, then Link apps & services. Pick an app, or use a pairing code or QR code.
- Apple Home: per Silicon Labs, open the accessory, scroll to the bottom and tap Turn On Pairing Mode to see a setup code (TP-Link says to open the Device Settings page, then tap Turn On Pairing Mode, then Copy Code).
- Alexa: open the device Settings, tap Other Assistants and Apps, then Add Another to generate a code.
- SmartThings: open the device, then its menu at the top right (Silicon Labs describes three dots, TP-Link a settings icon) and choose Share with other services.
2. The original setup code is for the first controller, and sharing codes expire
TP-Link’s FAQ says the Matter setup code for its devices can only be used to add the device to the first ecosystem. For the second one, you generate a new code in the first ecosystem’s app. Silicon Labs says the generated pairing code is 11 digits.
The same FAQ gives different expiry times per app. These are TP-Link’s figures, not the ecosystems’ own:
- Alexa: 15 minutes
- Google Home: 3 minutes
- Apple Home: 5 minutes
- SmartThings: 15 minutes
TP-Link also says the Google Home code page should stay open while you enter the code elsewhere, and that in Apple Home, tapping Dismiss means waiting 5 minutes for a new code. In our view, the practical lesson is to have both apps open before you ask for a code. We could not confirm whether these times are the same for every brand’s devices.
3. Sharing a Matter multi admin device into Home Assistant
To share a Matter device with Home Assistant when it already lives in Apple Home or Google Home, Home Assistant’s page lists what to prepare:
- The latest Companion app on your phone.
- The device already added to Apple Home or Google Home.
- The Matter integration installed (Settings > Devices & services). On Home Assistant OS in a regular setup, this installs the official Matter Server app.
The steps are:
- Open the Home Assistant app and go to Settings > Connectivity > Matter.
- Select Add device.
- Choose “Yes. It’s already in use.”, then pick the controller it is connected to, such as Google Home.
- Follow the dialog. When it finishes, name the device and pick an area.
The page says you can then control the device from Home Assistant and from Google Home. It also says to check the integration and the Companion app version if adding fails. It notes that adding a new device only works in the Companion app, not in a browser.
4. Sharing from Home Assistant, and removing a controller
The reverse direction is also on the Home Assistant page. Go to Settings > Connectivity > Matter > Devices, pick the device, choose Share device, then Share device again. The page says there is no need to press a hardware button to set the device to commissioning mode. In the other platform’s app, scan the QR code or enter the sharing code. The Companion app can also show Add to Apple Home (iOS) or Share with app (Android, full flavor only), when shown.
To check the result, open the three dots menu next to Share device and choose Manage fabrics. The page says the new platform should be listed, for example Google LLC.
To remove one controller, use the same Manage fabrics list and remove it there. The page adds: “If you want to remove Apple Home, also remove the Apple Keychain entry.” To remove the device from Home Assistant itself, use Delete in the three dots menu.
5. Network and Thread requirements
Home Assistant’s general recommendations say IPv6 (multicast) traffic must travel freely from your network to the Home Assistant host. You do not need IPv6 internet or a DHCPv6 server, but IPv6 must be enabled in Home Assistant (Settings > System > Network, set to Automatic or static). The troubleshooting section says Matter relies on local IPv6 and mDNS, and may not work well with VLANs, multicast filtering or faulty IGMP snooping. It recommends keeping the network “as simple and flat as possible.”
For Thread devices, the page says you need at least one Thread border router near the device. It also says third-party border routers such as a Nest Hub (2nd Gen) or HomePod mini are used only to reach the Thread radio network, and that the data they pass along is encrypted and unreadable to them. See our Thread border router explainer and our IoT VLAN or guest network guide.
Bridges are different from Matter multi admin
A bridge is not the same as sharing a Matter device. Home Assistant’s page lists the SwitchBot Hub 2, Aqara Hub M2, Ikea Dirigera and Philips Hue Bridge as bridges, says there is no guarantee every device from that ecosystem will appear, and says the Hue bridge is a case where the native Home Assistant integration offers more features and also runs locally. It also says Home Assistant itself is not a bridge.
The Apple side
Apple’s support page says paired Matter accessories sync using iCloud Keychain regardless of which app set them up, and that you can view them under Settings > General > Matter Accessories. It says pairing keys in iCloud Keychain are end-to-end encrypted. To add an accessory that is already paired elsewhere, Apple says to open the Home app, tap Add, then Add Accessory, then More options and select it.
For removal, Apple separates three choices: remove from Keychain (so the setup code is no longer stored there), remove from an individual connected service, or remove from all services. Apple warns that removing a service means you lose control of the accessory from that service’s app on your device. Neither page explains why, but Apple says the setup code stays in iCloud Keychain until you remove it, which fits Home Assistant’s advice to remove the Keychain entry too.
Matter multi admin checklist before you share
- Commission to one controller first (item 1), and keep the device’s own code safe.
- Open both apps before you generate a sharing code (item 2).
- Prepare Home Assistant: Companion app, Matter integration and Matter Server app (item 3).
- Pick the direction: “Yes. It’s already in use.” into Home Assistant, or Share device out of it (items 3 and 4).
- Check Manage fabrics to confirm the new controller is listed.
- Check IPv6 multicast and, for Thread, a border router (item 5).
Honest limits
- We tested nothing. This is a documentation roundup, not a setup log.
- The Google Home steps come from Silicon Labs and TP-Link only. We could not open Google’s help page.
- The code expiry times are TP-Link’s figures, not the ecosystems’.
- We could not confirm a fabric limit, or which devices or firmware versions support Matter multi admin.
- We did not read the Matter specification or later version changes.
- App menus change. Re-read your app’s current steps before you start.
Matter multi admin: your next step
Before you try Matter multi admin on a real home, pick one device you can afford to re-pair, and read its maker’s page for your two apps before you start. For wider context, see our Matter ecosystem advice guide and Matter cameras guide. More are in our no-subscription smart home guides.
How we checked
We read each page below on 16 November 2026. This is a documentation roundup of Matter multi admin; we did not test any device or app. Claims marked “in our view” are our own reasoning. TP-Link’s FAQ was last updated 29 September 2026, per the page.
Sources read 16 November 2026: Home Assistant, Matter, Apple Support, Pair and manage your Matter accessories, Silicon Labs, Multicontroller Ecosystem, Matter Handbook, The Fabric, Espressif, Matter: Multi-Admin, Identifiers, and Fabrics, TP-Link Tapo, How to Add Your Matter-Certified Device into Multiple Controllers.
More in this series: No-subscription and private smart home guides.