
A Home Assistant test restore is a dry run: you rehearse getting your setup back from a backup before you actually need to. This guide covers five things the official documentation says to check first. We tested nothing. Where the pages are silent, we say “we could not confirm.”

Table of Contents
What a Home Assistant test restore means in this guide
We use the phrase for a rehearsal on a spare system, not for your live one. The official pages we read describe how to restore, and what can go wrong. They do not say a restore test is required. In our view, a rehearsal is still a sensible way to find problems while nothing depends on the result.
This guide is about the rehearsal, not about making backups or the click-by-click restore steps. For those, see our Home Assistant backup to a USB drive guide, which covers creating backups and has a short “test your restore” section. Here we focus on what to check beforehand and what to compare afterwards. If you run the monthly releases, see also our 2026.11 release checklist. We give no prices, brand picks or timing promises.
Home Assistant test restore: 5 essential things to check before you need it
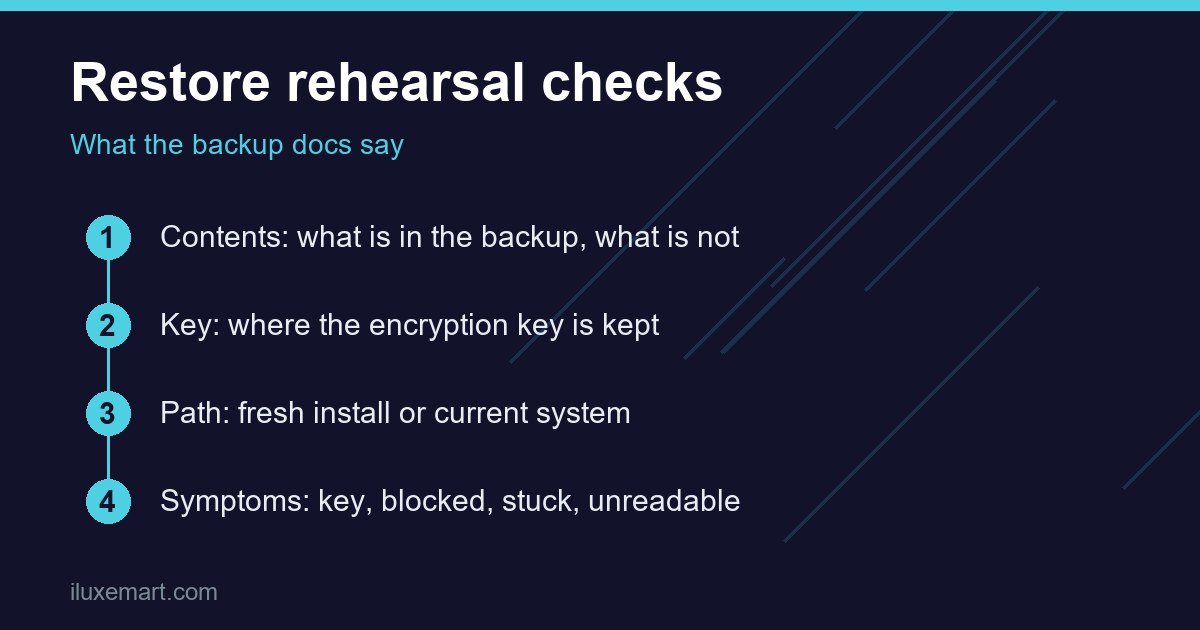
1. What does your backup contain, and what does a Home Assistant test restore miss?
The backups page says that on Home Assistant OS, you choose what a backup contains. The parts are:
- Home Assistant settings. The bare minimum to restore the system: the config folder and the SSL certificates.
- History. The historical data of your sensors, including the energy dashboard.
- Media. The media folder, for example camera recordings.
- Share folder. Apps often use it for custom or older configurations.
- Local apps folder. Files of apps that you created yourself.
- Apps. Installed apps and their data.
Two limits matter for any rehearsal. First, if you use a MariaDB or PostgreSQL database on another system, the page says that database “isn’t included.” On Home Assistant OS, if you run the database as an app, it is backed up with the app, so include the app in the backup. Second, install type changes the picture. On Home Assistant Container, a backup contains the settings and, if you choose, the history. Apps, media, share folders and network storage “are only available on Home Assistant OS.”
The page also lists files that are never included, such as log files and caches. In our view, a restored system will therefore not match the old one byte for byte, and you should not expect it to.
2. Where do the backup file and the encryption key live?
The page says backups are encrypted by default and stored as a .tar archive. The emergency kit page adds that backups on Home Assistant Cloud are always encrypted, while for other backup locations you can choose whether to encrypt. On Home Assistant OS the files sit in the /backup folder. On Container, for example in Docker, they sit in the backups folder of your configuration directory.
The kit is a text file holding the key, plus the name and address of your Home Assistant and the download date. It gives two instructions worth rehearsing. “Store the kit somewhere safe, outside Home Assistant.” And if you change the key later, keep the old kit too, because you need it for older backups.
The stakes are stated plainly. If you changed the key and lost the old one, the page says there is no way to restore those backups, and Nabu Casa does not store your key. If you never changed it, the page says Home Assistant still has the key, and you can download the kit again from the Encryption key card. A good first check, then, is whether you can find your kit today without logging in to the system it protects.
3. Which of the two restore paths will you rehearse?
The backups page names two ways to use a backup: during onboarding, for a new or factory-reset device, and on your current system. The step-by-step lives in the page and in our USB backup guide. Here is what is new for a rehearsal.
On the welcome screen, the onboarding page offers “Upload backup” or “Home Assistant Cloud” under the restore option. It adds that Yellow and Green owners should follow their own device documentation for restoring or migrating.
For a spare device, the onboarding path is the natural fit. In our view, that is because a freshly installed system is the situation you would face after a failed disk.
Four details shape a rehearsal:
- Conditions. On Home Assistant OS, the page says a restore only starts if the system is online, has at least 2 GB of free storage and is healthy. We could not confirm the same checks for Container or Core.
- Storage. For onboarding, the page says you cannot check free storage on the new device. Instead, read “Disk used” on the old system under System information. The new device’s storage must be larger than that value, plus at least 2 GB. The page also says the new device needs more storage than the old one, and that for a Yellow it is the eMMC size that counts.
- Waiting. In the onboarding restore, the page says “Don’t refresh the page.” You will see “Not found,” because the system is shut down, wiped and reinstalled from the backup. For the current-system path, it says only that Home Assistant restarts and the connection returns afterwards.
- Timing. It depends on backup size and hardware, and “a restore can take about 45 minutes” for a larger installation. We could not confirm a figure for a small one.
On the current-system path, the page says the parts you choose to restore overwrite what is there. In our view, that is a strong reason to rehearse elsewhere.
4. Where can you hold a Home Assistant test restore?
We did not do this, and the docs do not tell you to. The installation page lists device routes such as Raspberry Pi, and a route for “virtual machines, Home Assistant Container with NAS, or other” systems. In our view, either could serve as a rehearsal target, though we could not confirm that any page recommends it.
If you consider a virtual machine, the Linux, Windows and macOS installation pages open the same way: “Follow this guide if you are already running a supported virtual machine hypervisor.” All three list minimum resources of 2 GB of RAM and 2 vCPUs. The hypervisor lists differ:
- Linux: VirtualBox, Unraid and KVM.
- Windows: VirtualBox, Unraid, KVM, VMware Workstation and Hyper-V.
- macOS: VirtualBox. The page also says you can try UTM if VirtualBox is not supported on your Mac.
We do not endorse any product here, and we could not confirm how a virtual machine handles radios such as a Z-Wave stick. The backups page says controllers or radios must be plugged into the new device, and a different Zigbee radio needs a Zigbee migration.
5. What symptoms might a Home Assistant test restore trigger?
The troubleshooting section is, in effect, a pre-flight list. It names these symptoms:
- “The provided encryption key was incorrect.” The page says a backup can only be decrypted with the key used when it was made, and every system has its own. Causes it lists include entering the new system’s key, changing the key after the backup was made, restoring settings from another backup after downloading the kit, and a backup made with its own password. It also says Home Assistant cannot tell a damaged backup from a wrong key, so a damaged file can show the same message.
- The restore is blocked from execution. The error ends with a reason such as no internet connection, not enough free space, or an unhealthy system. On Home Assistant OS, an offline setup cannot start a restore, and a firewall or DNS filter that blocks checkonline.home-assistant.io must allow it.
- The restore seems stuck or shows “Not found.” The page says the restore is still running and tells you not to turn off or unplug the system. On Home Assistant OS, it describes the Observer page for watching the log, and says to reload the Observer, not the restore page.
- A backup can’t be read. Errors include “unexpected end of data,” which the page says means the file is incomplete, for example a copy that stopped early. The fix it gives is another copy of the backup.
What a good rehearsal should show
The docs do not define success, so this part is our own inference. In our view, a rehearsal is worth something if you can answer yes to each of these:
- The backup file was found, or uploaded, and accepted with your key.
- The restore started, with no “blocked” error.
- You reached the login screen afterwards and signed in with the old credentials.
- The things you rely on are present, such as integrations, dashboards and automations.
- You know which parts were not restored, and why.
None of this proves a future restore will go the same way. A different disk, version or radio could change the result.
Home Assistant test restore checklist
- List what the backup contains and what it leaves out, including any external database (item 1).
- Find the emergency kit outside Home Assistant, and keep old kits (item 2).
- Pick the path: onboarding on a spare device, or your current system (item 3).
- Choose a rehearsal target and read its installation page (item 4).
- Read the symptom list so a wrong key or a blocked restore is no surprise (item 5).
- Re-read the pages on the day you rehearse, because they change.
Honest limits of this Home Assistant test restore guide
- We tested nothing. This is a documentation roundup, not a restore log.
- We could not confirm any restore time for a small setup, the checks for Container or Core, or how a virtual machine behaves.
- We make no claim that a restore will succeed, or is safe, on your system.
- The docs do not say a restore test is required. Calling it worthwhile is our view.
- We give no prices or brand recommendations.
- Statements marked “in our view” are our own reasoning, not the official pages’.
Home Assistant test restore: your next step
Open your backup settings and find the emergency kit first. The docs say that if you lose an old key after changing it, those backups cannot be restored. Then read the restore section once, start to finish, before you touch a spare device. For the basics of making backups, use our USB backup guide. See also our Energy dashboard guide. More are in our no-subscription smart home guides.
How we checked
We read each page below on 18 November 2026. This is a documentation roundup of a Home Assistant test restore; we did not restore, install or test anything. Claims marked “in our view” are our own reasoning.
Sources read 18 November 2026: Home Assistant, Backups, Home Assistant, Backup emergency kit, Home Assistant, Onboarding, Home Assistant, Installation, Home Assistant, Install on Linux, Home Assistant, Install on Windows, Home Assistant, Install on macOS.
More in this series: No-subscription and private smart home guides.